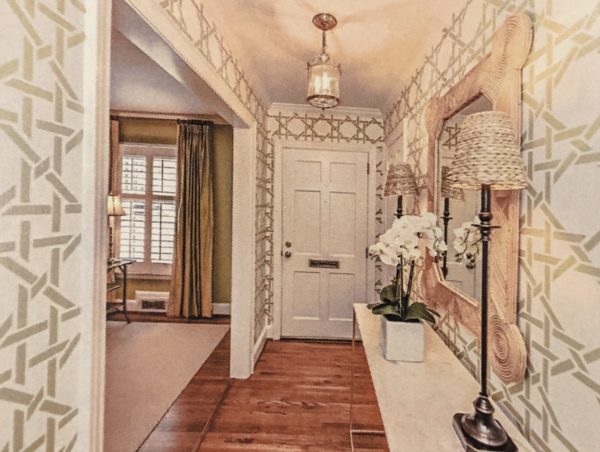
When we moved into our home about 2.5 years ago, the entry hallway had a very…interesting decor. I knew this was one area we’d need to paint. I assumed we’d be stripping wallpaper and then painting. Upon closer inspection, I found that this pattern was actually PAINTED on the wall! Can you believe it?! I’m still not sure how it was painted in such a perfect pattern – maybe a stencil or something? Anyway, it still had to go. It was just too much in this small hallway.

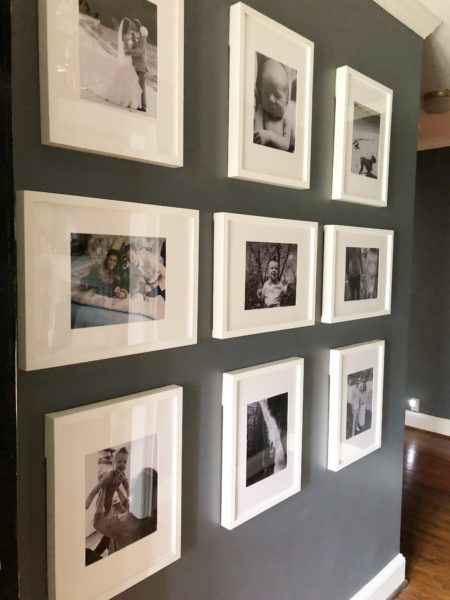
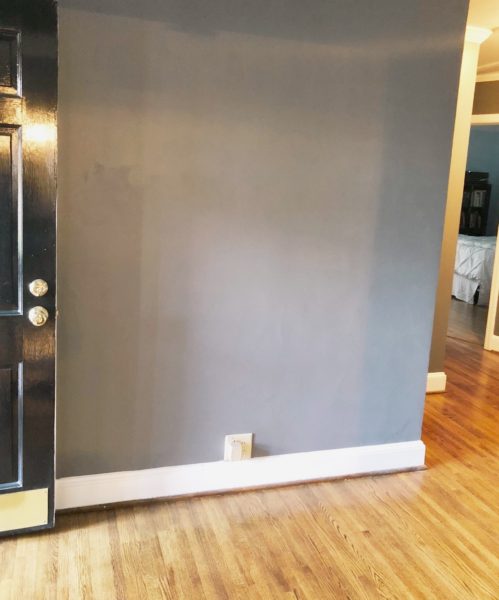
I had a vision of darker grey hallways with a black and white gallery wall to bring in a clean, slightly modern feel, but still keeping it bright with white frames and mats. So we had the walls painted a dark grey color when we moved in.

And then I focused on every other project in the house, got busy growing and having a baby, and here we are 2 years later and I finally decided it was time to get to work on that gallery wall I dreamt of a while back!
I went to Pinterest and honestly probably overdid it. Sometimes it can actually be paralyzing to do too much research into this type of stuff, because you will find endless things that you love and never be able to make a decision. I eventually came to the decision to keep it clean and simple. That was my original vision after all! I decided on a 3 x 3 grid with plain white frames and mats filled with black and white pictures, but with just 1 in color to make it a little interesting. I originally planned on all vertically hung frames, until I started choosing which pictures to put up and realized most of my favorite pictures were horizontally oriented. So I switched it up to have the middle row be horizontal.
I went with these plain white frames from Ikea because the price is great and they fit the look I was going for. The next big step was figuring out what pictures to fill them with. This proved to be one of the more difficult tasks! I thought about what the significant moments were for our family that I for sure wanted to include – Hudson’s newborn photos, his most recent 9 month photos, our marriage photos, our favorite trips, the pups, maternity photos. I then had to go back to all of these dates and find the pictures I liked best from those events/places, while also thinking about the orientation of the pictures (since I could only have 3 that were horizontal). I finally decided and sent them to be printed.
Once I had the frames and the photos, it was pretty easy. I laid them out on the floor first and measured to figure out how many inches were between each picture, and then used command strips to hang them so that I wasn’t putting a million nails into the wall. Side note: how did I just now learn about command strips? I must have been living under a rock but so glad I found out about these amazing things now! I had Luke help me with holding the pictures up while I made sure they were level and measured between them to make sure they were spaced properly.

I’m really loving the final product! I think it does exactly what I was hoping and brightens the space up. Now I’m just wondering why it took me so long!
What simple projects have you done to brighten or freshen up your home as we head into spring?
xo,
Shannon
*Post may contain affiliate links.
