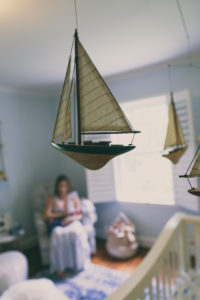
So I have to admit, the thing I was the most excited about when it came to preparing for a baby to join our family was creating the nursery. I had very clear themes in mind for a boy or a girl. When we found out we’d be welcoming a sweet baby boy, it was full steam ahead with a nautical nursery for him. Being a full-time working mama, I had more limited time to work on this, so I started it early (basically right after we found out it was a boy…although I’d started pinning some stuff before that for both boy and girl nurseries since I had themes in mind). I highly recommend this for mamas with a lot of competing priorities (work, other kiddos, etc.) because it allowed it to never become stressful for me. I would pick 1 thing to focus on for a week, or even a few weeks for bigger items/decisions, and it was a really enjoyable, relaxing outlet for me that allowed me time to get excited about and feel close to baby.
This theme almost seemed like a no-brainer for us, given that Luke and I met, fell in love, and got married in the Virgin Islands and both love the ocean and boating so much. We wanted to incorporate this passion of ours into our little one’s world, but I wanted to do so in a way that fully embodied the calmness and serenity that the ocean brings to me. I wanted to make his nursery this sanctuary for him, like the ocean has always been for me. So I wanted more of a neutral pallet with soft blues, and wanted to stay away from cartoonish images and bright colors that you often see on “kids” stuff. I also LOVE shiplap and the “farmhouse chic” look (yes, I’m a Fixer Upper and Joanna Gaines addict!), so I knew I wanted to have a shiplap accent wall.
With this plan in mind, I dove headfirst into Pinterest to start piecing together what this nursery for my sweet babe would look like!
Since I knew I for sure wanted the shiplap accent wall, we started with that. I found out that Home Depot has this amazing shiplap that is already painted with a distressed farmhouse look, so we went with these for convenience (even though we might have saved a little if we painted ourselves). They come in white and grey and make it super easy!
Shiplap (we used 5 boxes)
We originally planned to cut the pieces to cover the entire wall that the crib would be against, but cutting and getting it all to fit properly (including going around a door because it is on that wall) was going to get a little complicated, so we decided to just use the shiplap planks as they came and center them on the wall. So it really became very easy with my husband just using a nail gun to nail each plank to the wall!
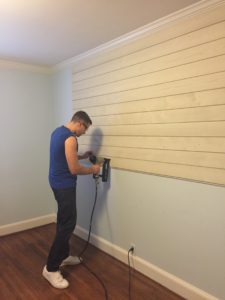
Thanks to my wonderful hubby for making my shiplap wall dream come true!
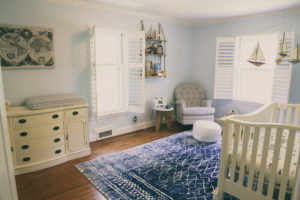
The walls of this room were already a pale blue (because the previous owners used it as a little boy’s nursery as well), and I loved the color – so no painting necessary! I actually really loved having the wall not fully covered with the shiplap and the blue showing on the sides.
The paint color is Benjamin Moore Sweet Bluette (813)

One of the biggest decisions was the rug. My initial plan was to keep it neutral. I waited until a lot of the nursery was done before actually deciding on and purchasing the rug. When I got to that point, I started seeing some nurseries that had funkier rugs in them and I really liked the look. I started trying to envision what a pop of color would look like in the room and the idea really grew on me. With a lot of input from a few of my very style-minded friends (thanks Danielle and Michelle!), I decided to give this one a try:
Rug
(purchased on sale and with extra discount coupon to save)
This is way out of my normal “box,” but I absolutely LOVED how it ended up looking in the space (plus it was super plush and soft, and a was great price). It was the perfect finishing touch for the nursery!
Here’s the finished product!
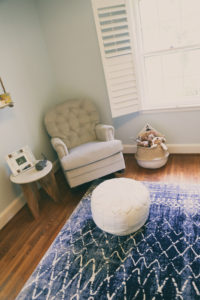
Rocker
Pouf
Side table
Sea Grass Basket
Frame and whale: Hobby Lobby $10-$15 each
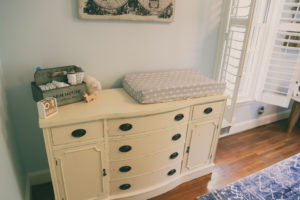
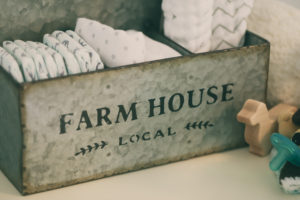

Dresser and Farmhouse bin: Farmhouse Market in Charlotte $300 and $15
Age blocks
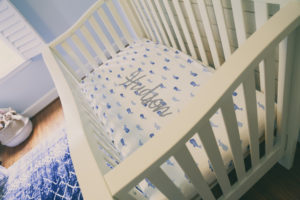
Crib: purchased used from a Charlotte mama for $100
(Here is a similar one.)
Personalized Organic Crib Sheet: Carousel Design ($27 with 30% off sale) – you get to choose colors, patterns, font and customize with baby’s name (such a great gift idea too!)
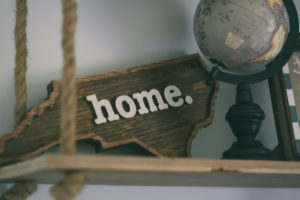
Sailboat and globe: Hobby Lobby for $10-$15 each
Hanging shelf: Hobby Lobby $60 (was going to DIY using this tutorial but estimated cost to be $50 and found it at HL for only $10 more so opted for convenience)
NC “home” sign: gift
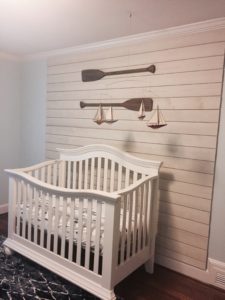
Shiplap
Stained Driftwood Paddles
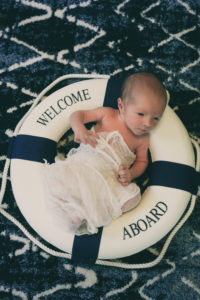
Rug
Most precious baby in the whole world – priceless…not for sale 🙂
My biggest advice for keeping the cost down is not to necessarily go with the big-store, name-brand baby stuff. It took a little more time, but I found the look I was going for at much lower prices when I looked at local furniture stores or online (Amazon, Wayfair), and I think it also made the nursery look less cookie cutter. Also, some items (crib, dresser, changing table) are great to get second-hand. We have a wonderful Facebook group full of mamas in Charlotte where people sell their gently used items for amazing deals. That’s how I got our crib, which saved me a ton! I’d definitely investigate whether you have something similar in your area.
Hudson’s nursery is now my favorite room in the house and I had so much fun creating it for him while we waited for his arrival!
What was your inspiration for your nursery? How did you want it to feel for your little one? What are your tips for creating an awesome space or sticking to a budget?
Pictures by the wonderful Nicole with Whole Lotta Grace Photography. If you’re in the Charlotte area check her out!
*This post may contain affiliate links.
